🌳 React to Elm: Migrating React to Elm in Three Ways
React was one of the first front-end frameworks I worked with. Soon after, I found Elm and I absolutely fell in love with it. Then my team and I started to move apps from React into Elm. This is a pretty fun problem, because there are a few ways to go about it: have Elm consume the React App piece by piece; have React consume the Elm App piece by piece; or replace the app entirely. I noticed there isn’t a lot of recent work on this topic. So I wanted to make a guide for anyone trying to make this transition. Elm is a wonderful language and so is React, so being able to use them in tandem is a powerful choice!
If you’ve used React, you most likely have used (or got started with) our friend, create-react-app. And if you’ve used Elm, you may have used the similar package, create-elm-app. Both of these packages are a great way to get started developing with Elm & React quickly, without going through the work of setting up a custom environment. They both provide eject, a script that permanently changes your create-LANG-app from a single-dependency on the tool, to all of the packages that bundle includes with their respective configurations.
For the purposes of this article, I’m going to assume you have some familiarity with React. As for Elm, I will write all the steps assuming you’re new to the language. And even if you’re already familiar with Elm, this should be helpful guide for transitioning between the two.
Code in Github – Elm React Components Package – Learn Elm Here
🌱 Getting Things Ready
Before we begin to replace any React with Elm, we will need to get Elm setup on your system. Head over to the Elm install instructions and download it for your OS. Once you’ve done that, jump into your existing React project. For this tutorial, I’ll use my own simple todo list app built on Webpack 5 with Webpack Dev Server. The full source for this is available in my GitHub repo.
If you bootstrapped with create-react-app, now is the time to run npm eject. Remember, this cannot be undone. Once you’ve done that you can either run npm i elm or add the following line to your package.json:
"elm": "^0.19.1-5"Don’t forget to update the version to whatever is most current. As of writing, this is the most recent npm package.
After that, we’ll need to generate an elm.json file by running the elm init command in the root directory (same place as package.json) of your project.
elm initFinally, let’s add the elm-webpack-loader to our webpack config. We’ll install the packages and then add them to our webpack config.
npm i elm elm-webpack-loader elm-hot-webpack-loaderYou can find this under config/webpack.config.js. Scroll down to module.rules and add a new rule before the test for js|mjs|jsx|ts|tsx. There’s more to configuring elm-webpack-loader than I’m going to show here, but the following code will get you up and running:
{
test: /\.elm$/,
exclude: [/elm-stuff/, /node_modules/],
use: [
{ loader: 'elm-hot-webpack-loader' },
{ loader: 'elm-webpack-loader' },
],
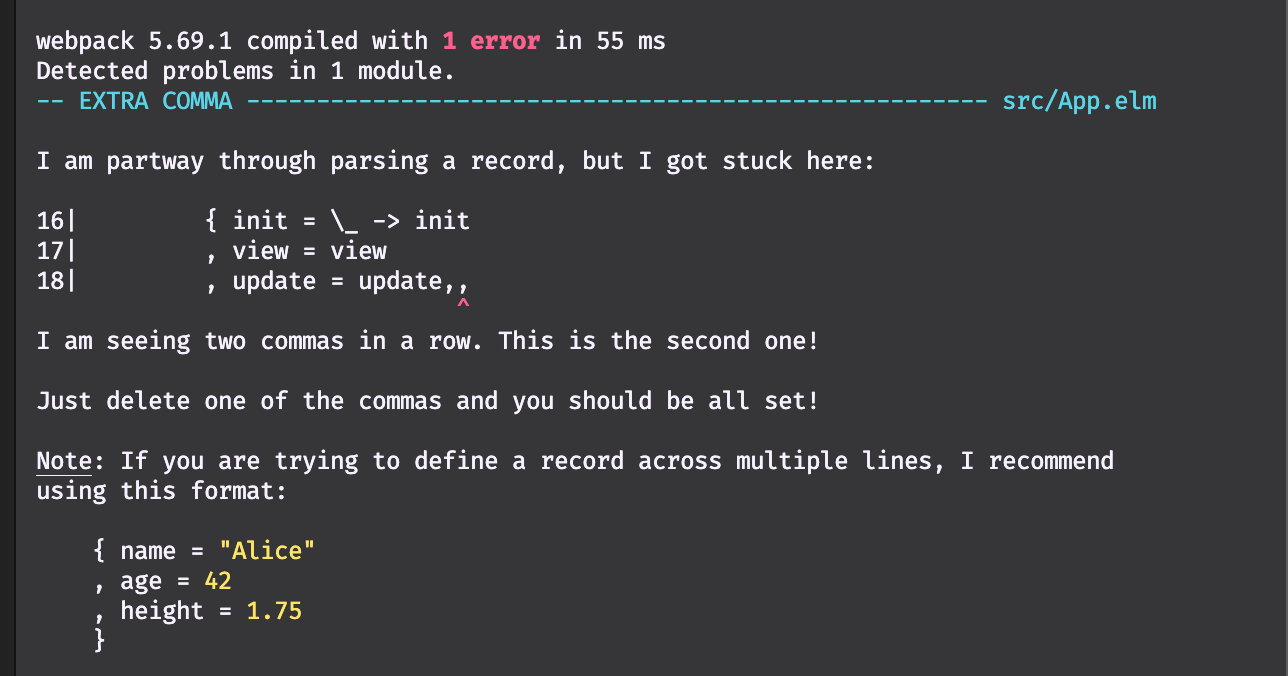
},And with that, you have successfully set up your project to have both React and Elm apps. Yay for you! 👏 The best verification we can have is looking at the Elm compiler, which has started a nice conversation about a bug in my Elm app:
⚛ → 🌳 Replacing a React App with an Elm App
In a perfect world, we could just replace our React App with our Elm App. While this probably isn’t the most likely case, it is an option I have used many times. This is especially good for simple apps or just low-risk ones. One amazing benefit of Elm is that there are no runtime exceptions, so you won’t be risking the entire app breaking when you deploy.
To get started, create a file called App.elm in src. This will replace your App.js. The React code for this example app is over on GitHub. Below is the Elm version of the app:
module App exposing (main)

import Browser
import Html exposing (Html, div, form, h1, input, li, text, ul)
import Html.Attributes exposing (class, type_, value)
import Html.Events exposing (onInput, onSubmit)


---- PROGRAM ----


main : Program () Model Msg
main =
    Browser.element
        { init = \_ -> init
        , view = view
        , update = update
        , subscriptions = \_ -> Sub.none
        }


init : ( Model, Cmd Msg )
init =
    ( initialModel, Cmd.none )


initialModel : Model
initialModel =
    { items = []
    , inputText = ""
    }


---- MODEL ----


type alias Model =
    { items : List String
    , inputText : String
    }


type Msg
    = ChangedText String
    | SubmittedForm


---- UPDATE ----


update : Msg -> Model -> ( Model, Cmd Msg )
update msg model =
    case msg of
        ChangedText text ->
            ( { model | inputText = text }, Cmd.none )

        SubmittedForm ->
            let
                items =
                    model.inputText :: model.items
            in
            ( { model | items = items, inputText = "" }, Cmd.none )


---- VIEW ----


view : Model -> Html Msg
view model =
    div [ class "App" ]
        [ h1 [] [ text "Todo List" ]
        , viewTodos model.items
        , viewTodoForm model.inputText
        ]


viewTodos : List String -> Html Msg
viewTodos items =
    ul [] (List.map (\item -> li [] [ text item ]) items)


viewTodoForm : String -> Html Msg
viewTodoForm inputText =
    form [ onSubmit SubmittedForm ]
        [ input [ type_ "text", onInput ChangedText, value inputText ] []
        , input [ type_ "submit", value "Add" ] []
        ]
With that in place, let’s hop into our index.js file and change the ReactDOM.render(...) call to one to initialize Elm. First, import the Elm app at the top of the file:
import { Elm } from './App.elm';You can then call Elm.MODULE_NAME.init(...) to tell Elm which DOM node to initialize on.
Elm.App.init({ node: document.getElementById('root') });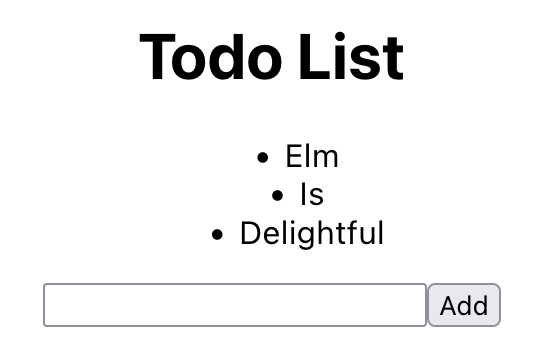
And with that, the React App will be replaced with a shiny new Elm App to track our todo items. But it’s not always the case that a full replacement is the best or safest way to transition from React to Elm. Let’s take a look at slowly consuming a React App with an Elm App.
🌳 > ⚛ Consuming a React App within an Elm App
Although there isn’t a great way to load a React component within an Elm app, Elm provides ports to let us interact between the two. My favorite way to move a React app into an Elm app is to move the app state into the Elm app and then slowly consume the behaviors of the React app. In this example we’ll put the list items in the Elm app, but we will leave displaying the list and adding new items to the React app. Let’s get started by created an elm app in App.elm with a model to hold the list.
module App exposing (main)

import Browser
import Html exposing (Html, div)


---- PROGRAM ----


main : Program () Model Msg
main =
    Browser.element
        { init = \_ -> init
        , view = view
        , update = update
        , subscriptions = \_ -> Sub.none
        }


init : ( Model, Cmd Msg )
init =
    ( initialModel, Cmd.none )


initialModel : Model
initialModel =
    { items = []
    }


---- MODEL ----


type alias Model =
    { items : List String
    }


type Msg
    = SubmittedForm


---- UPDATE ----


update : Msg -> Model -> ( Model, Cmd Msg )
update msg model =
    ( model, Cmd.none )


---- VIEW ----


view : Model -> Html Msg
view _ =
    div [] []
To pass data to/from JavaScript to Elm, we’re going to need to add two ports. On the first line of App.elm add port before module. This leaves us with port module App exposing (main). Now let’s add two ports, one for receiving a string from JavaScript to add an item and the other for passing a list of strings back to JavaScript for displaying them. These two ports look like this:
port addItem : (String -> msg) -> Sub msg

port sendItems : List String -> Cmd msg
Now let’s add the behavior for adding a new item to our update function. This implementation looks almost identical to the one for replacing the elm app, except our SubmittedForm type will also contain a string. We’ll have this value passed in from JavaScript and then call sendItems with the new list of items to update our React app.
type Msg
    = SubmittedForm String

update : Msg -> Model -> ( Model, Cmd Msg )
update msg model =
    case msg of
        SubmittedForm newItem ->
            let
                items =
                    newItem :: model.items
            in
            ( { model | items = items }, sendItems items )
The last thing to do is to add a subscription which will be called whenever the addItems port is sent from JS. Change our Browser.Element function to call subscriptions = subscriptions and then create a new subscriptions function below. This function will call our addItems port with the local Msg to send the string to. That function is SubmittedForm and the implementation is as follows:
subscriptions : Model -> Sub Msg
subscriptions _ =
    addItem SubmittedForm
JavaScript & React
That’s all there is to do on the Elm side of things. Now let’s shift our focus back to our index.js file. We’re going to render both our Elm App and our React App, but the Elm app will only be responsible for holding the state. First, we need to assign the Elm app init call to a variable so that we can access our ports. Once we have that, we can pass the ports into our React component as props.
const elmApp = Elm.App.init({ node: document.getElementById('elm-root') });

ReactDOM.render(<App ports={elmApp.ports} />, document.getElementById('root'));
The last step is to update our React component to use the Elm ports. Because our addItem port takes a string, the only change we have to make in the React component is to replace our addItem function with a reference to ports.addItem.send. We first get ports by destructuring it from props.
const App = ({ ports }) => {
  const [items, setItems] = useState([]);
  const addItem = ports.addItem.send;

  ...
}
To receive the updated list of items from Elm, we’ll need to subscribe to our sendItems port. This subscription will pass a list of items, which I will just put in local state using a useState hook.
ports.sendItems.subscribe((items) => setItems(items));And with that, we have successfully moved our React app state into an Elm app, which will allow us to take it apart piece by piece, until we only have the Elm app left. If I were to continue this, the next thing I would do would be to move the list display into the Elm app. Finally, we could move the form over and eliminate the React App altogether.
⚛ < 🌳 Consuming an Elm App within a React App
Finally, there is the option of keeping the main app in React and slowly pulling in parts of Elm. I don’t prefer this method, because Elm doesn’t have a component-based model like React. In my opinion, it makes this a less natural transition. That being said, sometimes I find that this is the best way to go for a large and complex React app. There is a pretty nifty npm package that let’s you use an Elm app as a React component. If you don’t like this solution, you can use ports like we did in the previous example. Ports might be the better option, but this package will let us get running quickly. And since we’re talking about transitioning to Elm, the faster choice seems better to me.
Go ahead and run npm i @elm-react/component. This package includes the function wrap that will let us wrap our Elm app in a React component that will convert props into the ports we define in our Elm app. Pretty cool, right? At the start of our App.js component, import the function and our Elm app.
import wrap from '@elm-react/component';
import TodoList from './TodoList.elm';
After that, we can define a new component by passing our Elm app to the provided wrap function.
const TodoListComponent = wrap(TodoList);And with that, you can use <TodoListComponent /> within JSX, just as if it were a React component. Let’s replace the <Todos /> react component with our elm one.
<TodoListComponent updatedItems={items} />updatedItems will be the name of the port in our Elm app. This port will work exactly like the subscription we created in the previous example.
The Elm “Component”
Let’s hop back over to our Elm app and change it to a port module on the first line. This leaves us with the full component looking like this:
port module TodoList exposing (main)

import Browser
import Html exposing (Html, li, text, ul)
import List


---- PROGRAM ----


main : Program () Model Msg
main =
    Browser.element
        { init = \_ -> init
        , view = view
        , update = update
        , subscriptions = subscriptions
        }


init : ( Model, Cmd Msg )
init =
    ( initialModel, Cmd.none )


initialModel : Model
initialModel =
    { items = []
    }


subscriptions : Model -> Sub Msg
subscriptions _ =
    updatedItems NewItems


---- PORTS ----


port updatedItems : (List String -> msg) -> Sub msg


---- MODEL ----


type alias Model =
    { items : List String
    }


type Msg
    = NewItems (List String)


---- UPDATE ----


update : Msg -> Model -> ( Model, Cmd Msg )
update msg model =
    case msg of
        NewItems items ->
            ( { model | items = items }, Cmd.none )


---- VIEW ----


view : Model -> Html msg
view model =
    ul [] (List.map (\item -> li [] [ text item ]) model.items)
First take a look at line 42, where we define the port updatedItems. This name needs to match the name of the prop we passed into our wrapper React component. Because we’re passing in an array of strings, we’ll make it a List String type in Elm. Then we’ll define our subscriptions function, as we did before, to call updatedItems with the NewItems Msg we define below.
NewItems has a List String argument, which will match our port. Lastly, we move to our update function to define the behavior when a NewItems Msg is received. We’ll take in the list as items, locally, and we’ll update the local model state to this new list.
Then for our view we need only to display a list of the items in our todo-list. This will be a simple ul with a map of the list items. And that’s it! Startup the app and you should see the list displayed in Elm, while maintaining the state in the React app.
🌳 Conclusion
I hope that’s enough to get you up and running. Any way you go about it, I think the tooling is really great for Elm’s interop with JavaScript. In my opinion, keeping your interactions between the two to a minimum is best, because you’ll be missing out on the amazing runtime safety that Elm offers. That’s one of the biggest draws to Elm for me, so I try not to use ports as much as possible. However, you definitely have to, and being able to make the two interact while replacing an app is vital. So I think any of these methods would serve you well.
I prefer to put my app state into Elm and use React for interactions. Essentially eating the app from the top down. But the elm-react-components package is fantastic and easy to use, so if you’re wanting to start there, especially if you’re new to Elm, I think it’s a great option.
Best of luck! Happy Elming.
Footnote: Msg and msg
While reading this, it occurred to me that I change between Msg and msg regularly in Elm. When I was learning Elm I found this to be pretty confusing, so I wanted to clarify. In Elm, Msg is a concrete type that you define in your module. In all of the Elm examples here (and most places) you’ll see a type Msg line right above our update function. These are all of the events that can update the app’s state.
The lowercase, msg, on the other hand can be any type. You can think of it as a placeholder for “any” type that may later exist. This is exemplified in the view functions in this code. In the case that the Elm app had to handle state updates, the type was Html Msg, because the DOM would call a Msg to update the todo items when a form was submitted. However, in the 3rd case, I used Html msg, because there are no events in our Msg that the DOM would call.
Recommended Posts
⚡️ Getting Started with Vite for React and Elm
March 4, 2022
😲 Elixir’s Public Types for GenServer/Supervisor
February 4, 2022
🌊 A Realworld Introduction to Elixir Flow
January 29, 2022