I’m quite a bit late to setting my goals for the year. Yikes, March arrived so quickly. I wanted to take some time to put on paper (digital paper) what technologies I’m wanting to explore this year. Although I already shared some habits I’m working on, I didn’t really cover anything I want to accomplish in software. So for this post, I will be sharing a comprehensive list of every technology that I’m wanting to learn this year. I don’t believe that I’ll be able to accomplish every item on the list, because it may be too much. But I would rather be hopeful.
I’m going to break each technology down into categories that I think make the most sense and share each technology within them. I will also share my motivation for learning them and maybe some ways I’ll go about using them in projects. If you want to follow my learning on any of this, I keep most of my repos public on my GitHub. Lastly, these aren’t in any order, other than the categories I thought to group them in. Languages felt like a natural place to start, followed by web technologies, and ending with tools and miscellaneous items.
🤬 Language Technology
The first type of technology that I want to add to my repertoire is languages. Since I started programming, I’ve had the opportunity to use a lot of great languages, spending most of my time with: JavaScript, PHP, Elixir, Elm, C#, and other web languages (HTML, CSS, etc). Because I have spent a lot of time in the front-end in the last two years, I would like to focus my attention on more application or back-end technologies.
🧪 Elixir
This one is a bit of an oddball. I actually started learning Elixir back in 2020 and am using it in my full-time position at InfluxData/InfluxDB. In this time it has quickly become one of my favorite languages to use. If you aren’t already familiar, Elixir is a language built on top of the Erlang language and its VM, BEAM. Elixir is a functional programming language, which helps to write more reliable code because all functions are pure and data is immutable. I’ve also had the opportunity to build some apps that were able to process a large amount of data concurrently because of Elixir’s processes. I really can’t say enough about how awesome of a language it is. On top of that, it just has a nice syntax.
I’m putting it on the list because I still feel like I have a lot to learn in terms of architecting an application and using the common libraries for the language. This year I would like to spend some more time with the Phoenix framework and build some applications using Phoenix’s LiveView. I think LiveView has a good shot of replacing JavaScript in some applications, so I would love to get my hands on it.
⚙️ Rust
I first heard about Rust from a blog post by Discord. I honestly don’t know that much about Rust, considering how much I’ve heard about it. The ecosystem and dev tooling appear to be excellent. But mostly, I have heard that the compiler is extremely helpful and friendly. I’ve become accustomed to the errors provided by the Elm compiler; getting that on the backend sounds great. It’s not a functional language, but it does promise reliability through a strict type system and memory management.
I’ll likely try Rust on a web project first. It is supposed to have good WASM support, so I’ll definitely try a project with that. After that, I’d like to give it a go with a hardware project. In college, I studied Electrical & Computer Engineering, and I’ve had an itch to apply some of that knowledge to something physical. At this point, I think I’ll create a device for performing music. I may give a go at writing rust for Arduino. Honestly, a better language that worked well with lower-level and hardware technology would be nice.
ƛ Haskell
Haskell is a bit of a stretch goal. But, since I love Elm so much, it seems natural to learn the language the compiler is written in. Haskell is a statically-typed, functional language. No other language gives me the confidence in deployment like Elm does. And I’m hoping Haskell will give me the same confidence because it also makes you handle all side-effects.
I would like to try a Haskell web project, which will mostly likely be a game. I anticipate it working extremely well for an event-driven game. Elm will almost certainly be the front-end. I think its animation support is incredible. So we’ll see how this one goes. It’s a wishlist thing to learn, so fingers-crossed, I’ll be able to learn it. 🤞
🌏 Web Technology
This next category has two web technologies that I’ve dipped my toes in, but haven’t had the opportunity to use in a real application. I work as a software engineer, and have been deeply involved in web development for more than decade. I’m neglecting WASM from this list of technology, because I don’t plan on investing a lot of time into that, specifically. However, I think it’s likely that I’ll use it while working with Phoenix, Haskell, and maybe Rust.

🔌 Websockets
Websockets are the future. Or so I’ve been told 😜. Websockets, if you’re not already familiar, break the HTTP request/response lifecycle by allowing two-way communication. With websockets, messages can now be sent from the from the server to the client and handled in a callback. I’ve had the opportunity to use them in some experiments. But I’ve never used them in a production application.
I’m hoping to get some experience using Websockets this year. I’ll most likely be using Phoenix Sockets in Elixir, since that’s where I’ll be spending the bulk of my time. I think an interesting app to develop would be something with a shopping cart, so that I can send pricing updates to the clients. Alternatively, I might look into a chat application. I do think they would be a valuable tool to get some experience with, so if you have any ideas, please let me know!

📱 Progressive Web Apps (PWAs)
Progressive Web Apps (PWA) are a really cool technology. I used them for the first time in 2021 after hearing a talk by lemon at a conference. Until then, I hadn’t realized how far browser support had come. My coworker and I went back to our hotel room and immediately gave a go at converting an existing website to a PWA. It proved to be fairly easy to get past the initial steps. We quickly made a web app installable and to include some assets to be cached locally.
This yeah, I’m hoping to get to develop an app into a PWA with more extensive features. The primary feature I want to get experience with is queuing updates to be sent to the server while offline. I haven’t done a lot of state management with IndexedDB, but I’m going to want to figure that out quickly.
At one point, my personal website was a PWA and I’m going to try to get that back to being one. I have another blog where I talk about Tacos and it’s PWA written in Elm. I would like to update some features on that blog to work better for offline (like comments). If I do get the opportunity to work on a game, I might see about getting it published on the Microsoft Store and/or Google Play.
🛠 Tools & Misc Technology
This is a bit of a bucket of the other things i want to learn. I will probably learn both of these while working on another skill. And with any luck, I’ll be able to use some of them as part of my job.

💄 Tailwind CSS
Back in the day, I just had CSS. After a while, I finally got SASS, which felt like a miracle. I come from the old days of floating elements and praying. Honestly, although I’ve become familiar with the new features in CSS as they appear, I haven’t picked up any new CSS tooling since SASS. I have tried bootstrap a few times throughout the years, but it never really stuck. It seems like Tailwind has been generating a lot of buzz and I think their website is pretty. And having a pretty website can get me to do just about anything.
Tailwind CSS will likely find its way into one of my projects while learning another language. I think if I make a fun app or static website to learn Rust or Phoenix LiveView, I could pop it in. I’m somewhat hopeful that I’ll fall for it with all of my heart. But even if not, I might just get some inspiration in design.
⏱ InfluxDB + Telegraf
This probably deserves to be a bit higher on this list. My employer, InfluxData, develops the leading time-series database. A time-series database (TSDB) is a database purpose-built for timestamped data. We have a cool page about it here, if you want to learn more. I work on the E-Commerce team, so I don’t spend time with InfluxDB for work. However, I have a project idea involving my thermostat that will require a lot of timestamped data. While I probably could get by with a SQL or JSON db, I think a TSDB is serves analytics-style data really well.
InfluxData also develops the open source project Telegraf. Telegraf works as an ingest for a TSDB. Telegraf can even be used with other TSDBs, other than InfluxDB. I’ve actually had the opportunity to work with it once, and I found the experience to be really easy. I was able to authentication against an OAuth API, refresh the token, and pull data all with a single config file. It’s pretty sick!
🎓 Learning Technology Conclusion
Wish me luck! Again, I don’t believe I’ll be able to learn all of these, but I’m hoping to at least learn more about each of them. I imagine that new technologies and tools will present themselves as I continue learning. If something useful presents itself, I’ll work on that, of course.
Thanks so much for reading! Again, you can follow my learning over on my GitHub and sometimes on my twitter, @abshierjoel!
– Joel Abshier
I feel like everywhere I look I’m seeing the super fancy Vite logo. I thought it would be fun to take a look at Vite for my first time today and share my experience with it. Vite is a front-end build tool that comes out-of-the-box with a dev server and hot module reloading. I don’t know a lot beyond it yet, other than the claims of an “optimized build” and “rich features” from their GitHub.
Honestly, my hope going into this is that it can be like Webpack, but with a lot less headache. I primarily work with React and Elm for the front-end, so I would like to get both of those working with hot module replacement. With that in mind, let’s take a look at that gorgeous logo and get started!
👩🔬 Development
The Getting Started page on their website tells us to run the following command:
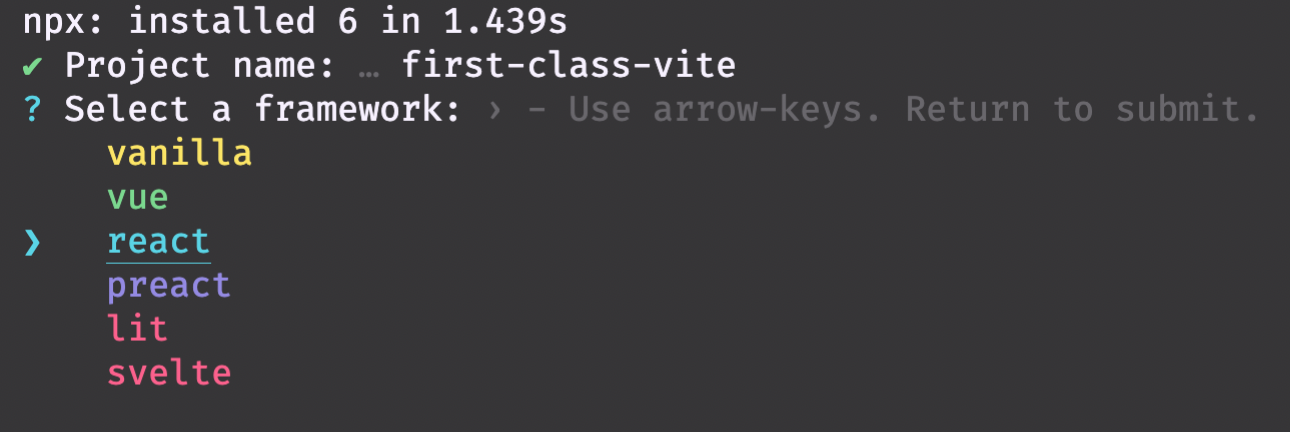
npm create vite@latestUpon running this command, we are prompted with a choice to pick our framework. I’m going to pick React to get things going quickly. After this I choose to use React without TypeScript, because I’m feeling a little wild today 🐅.
And… done? I’ll run a cd first-class-vite and then run npm i. After packages are installed, we see that Vite came with three scripts in package.json: dev, build, preview. Assuming dev is the one we’ll use to dev, let’s run that. At this point we’re shown a message saying the Vite app is running at localhost:3000. Go there and take a look!
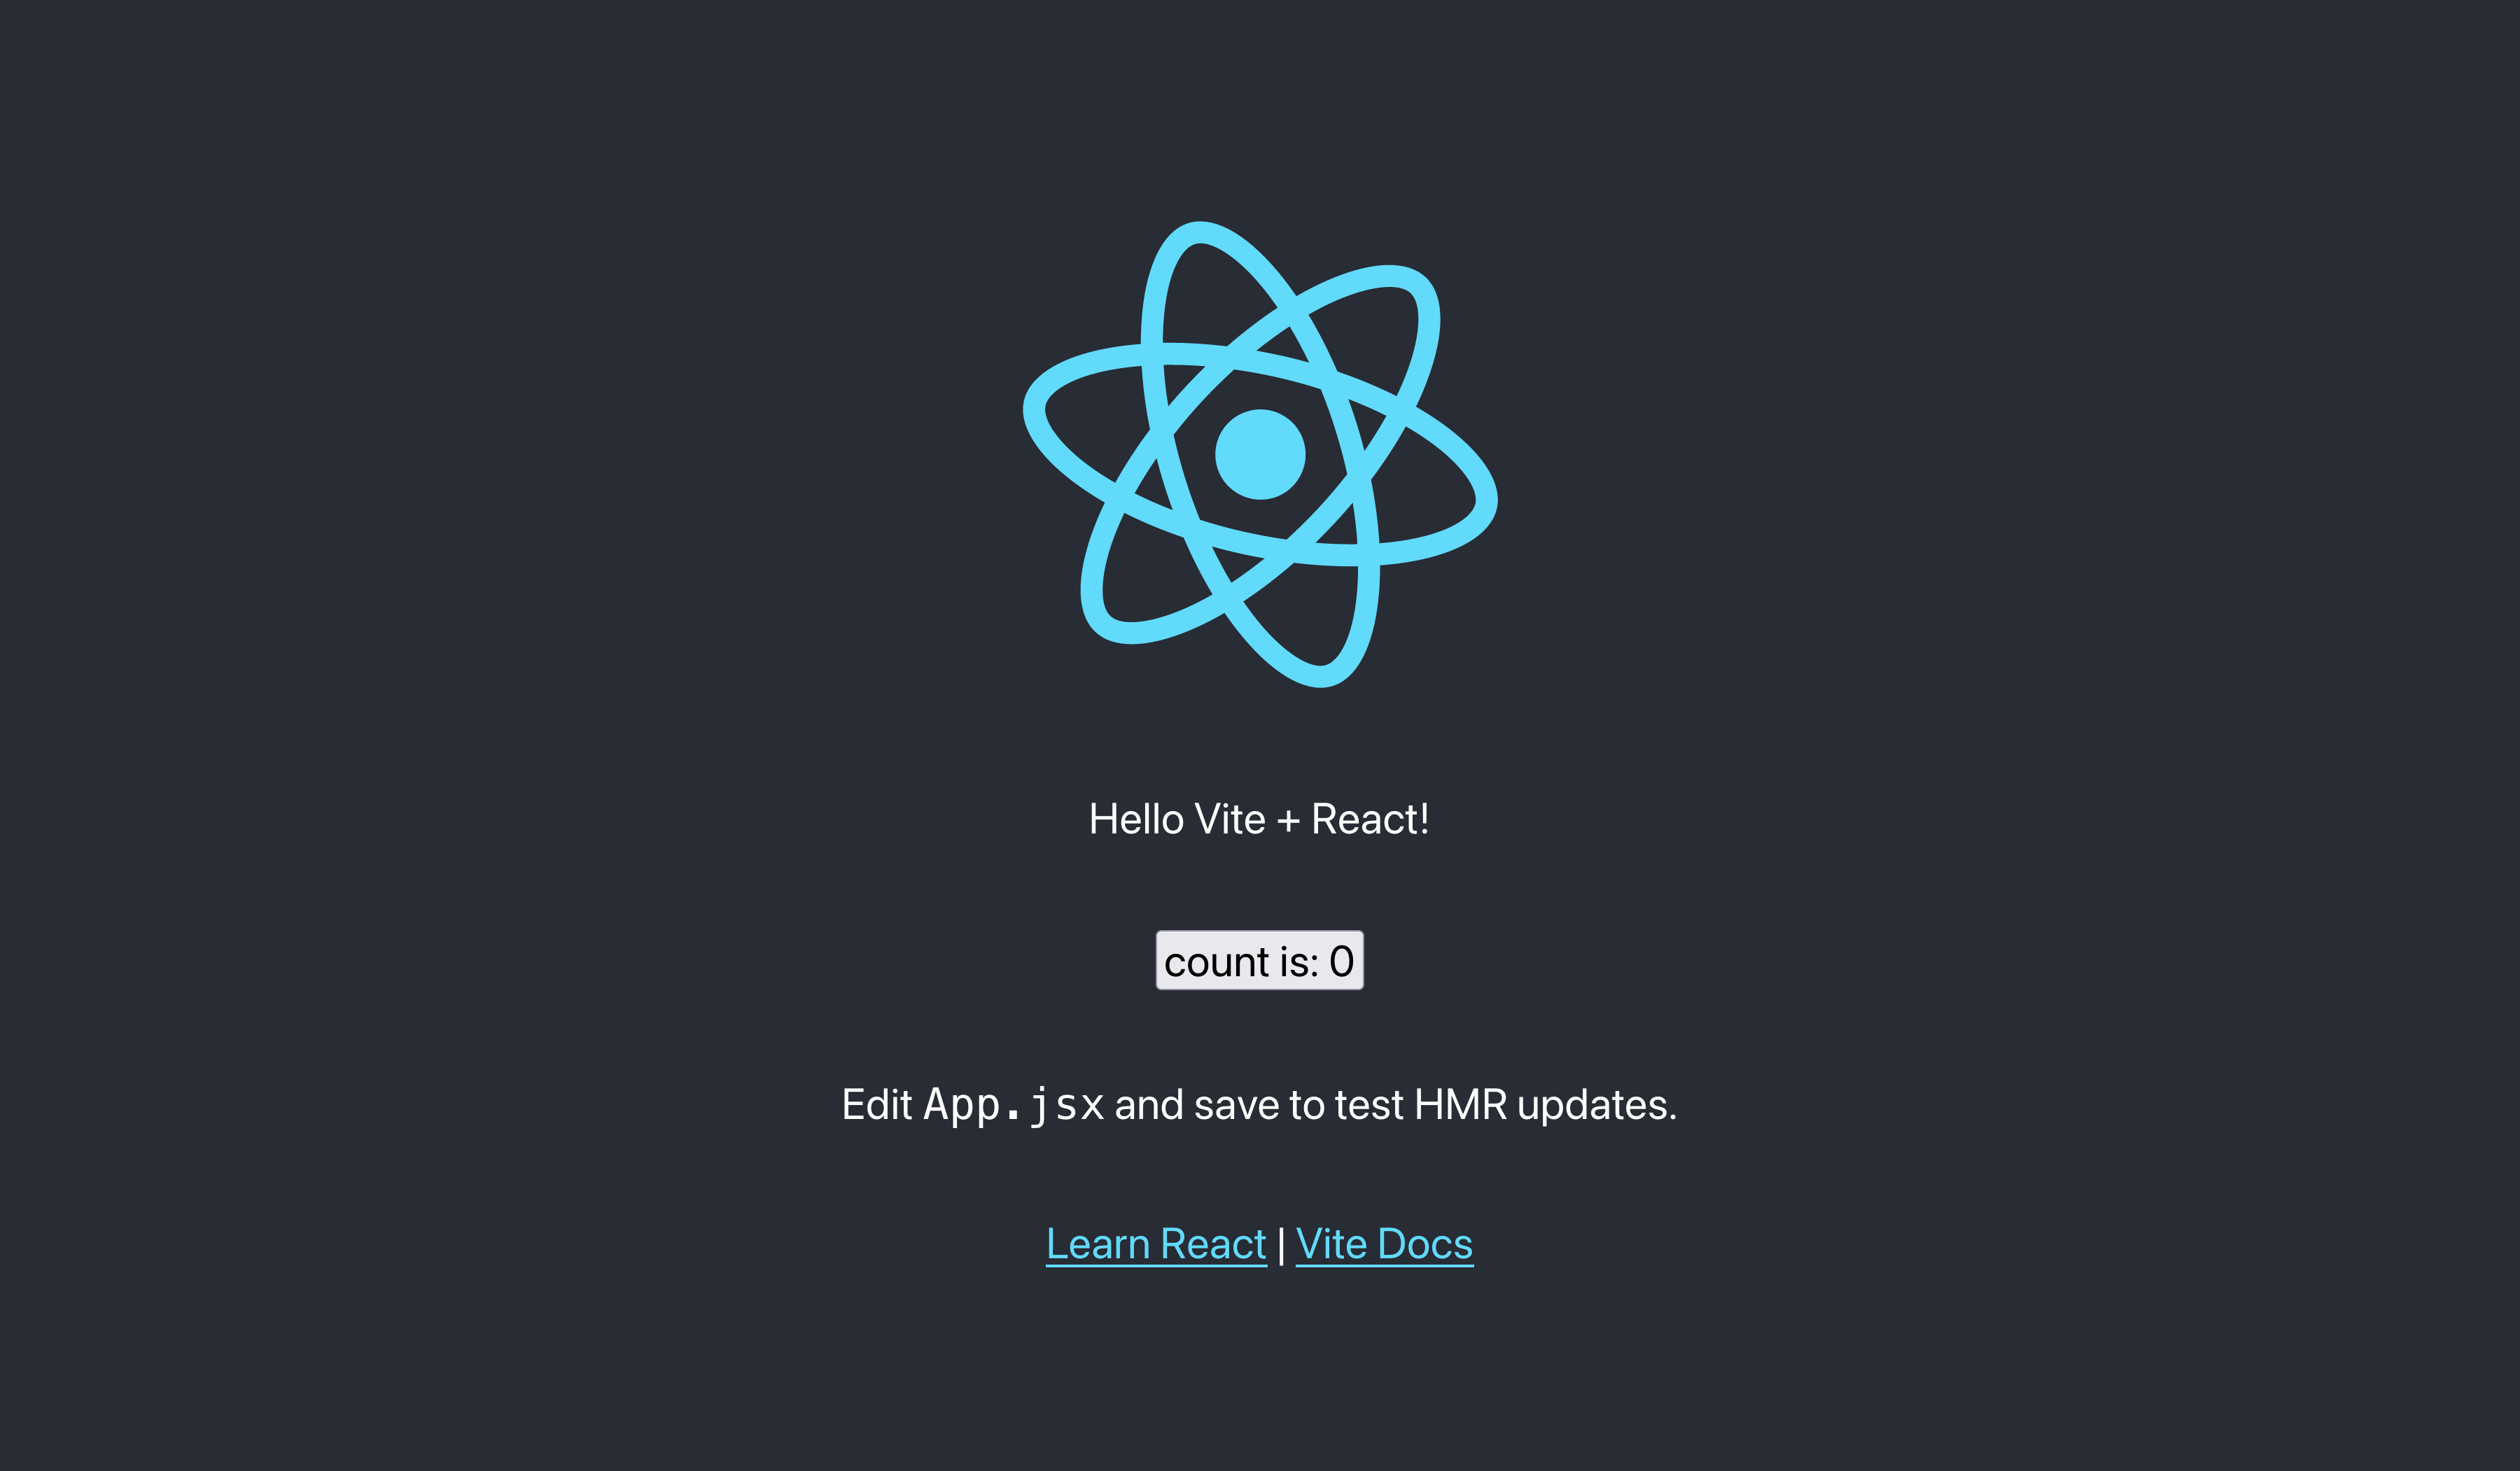
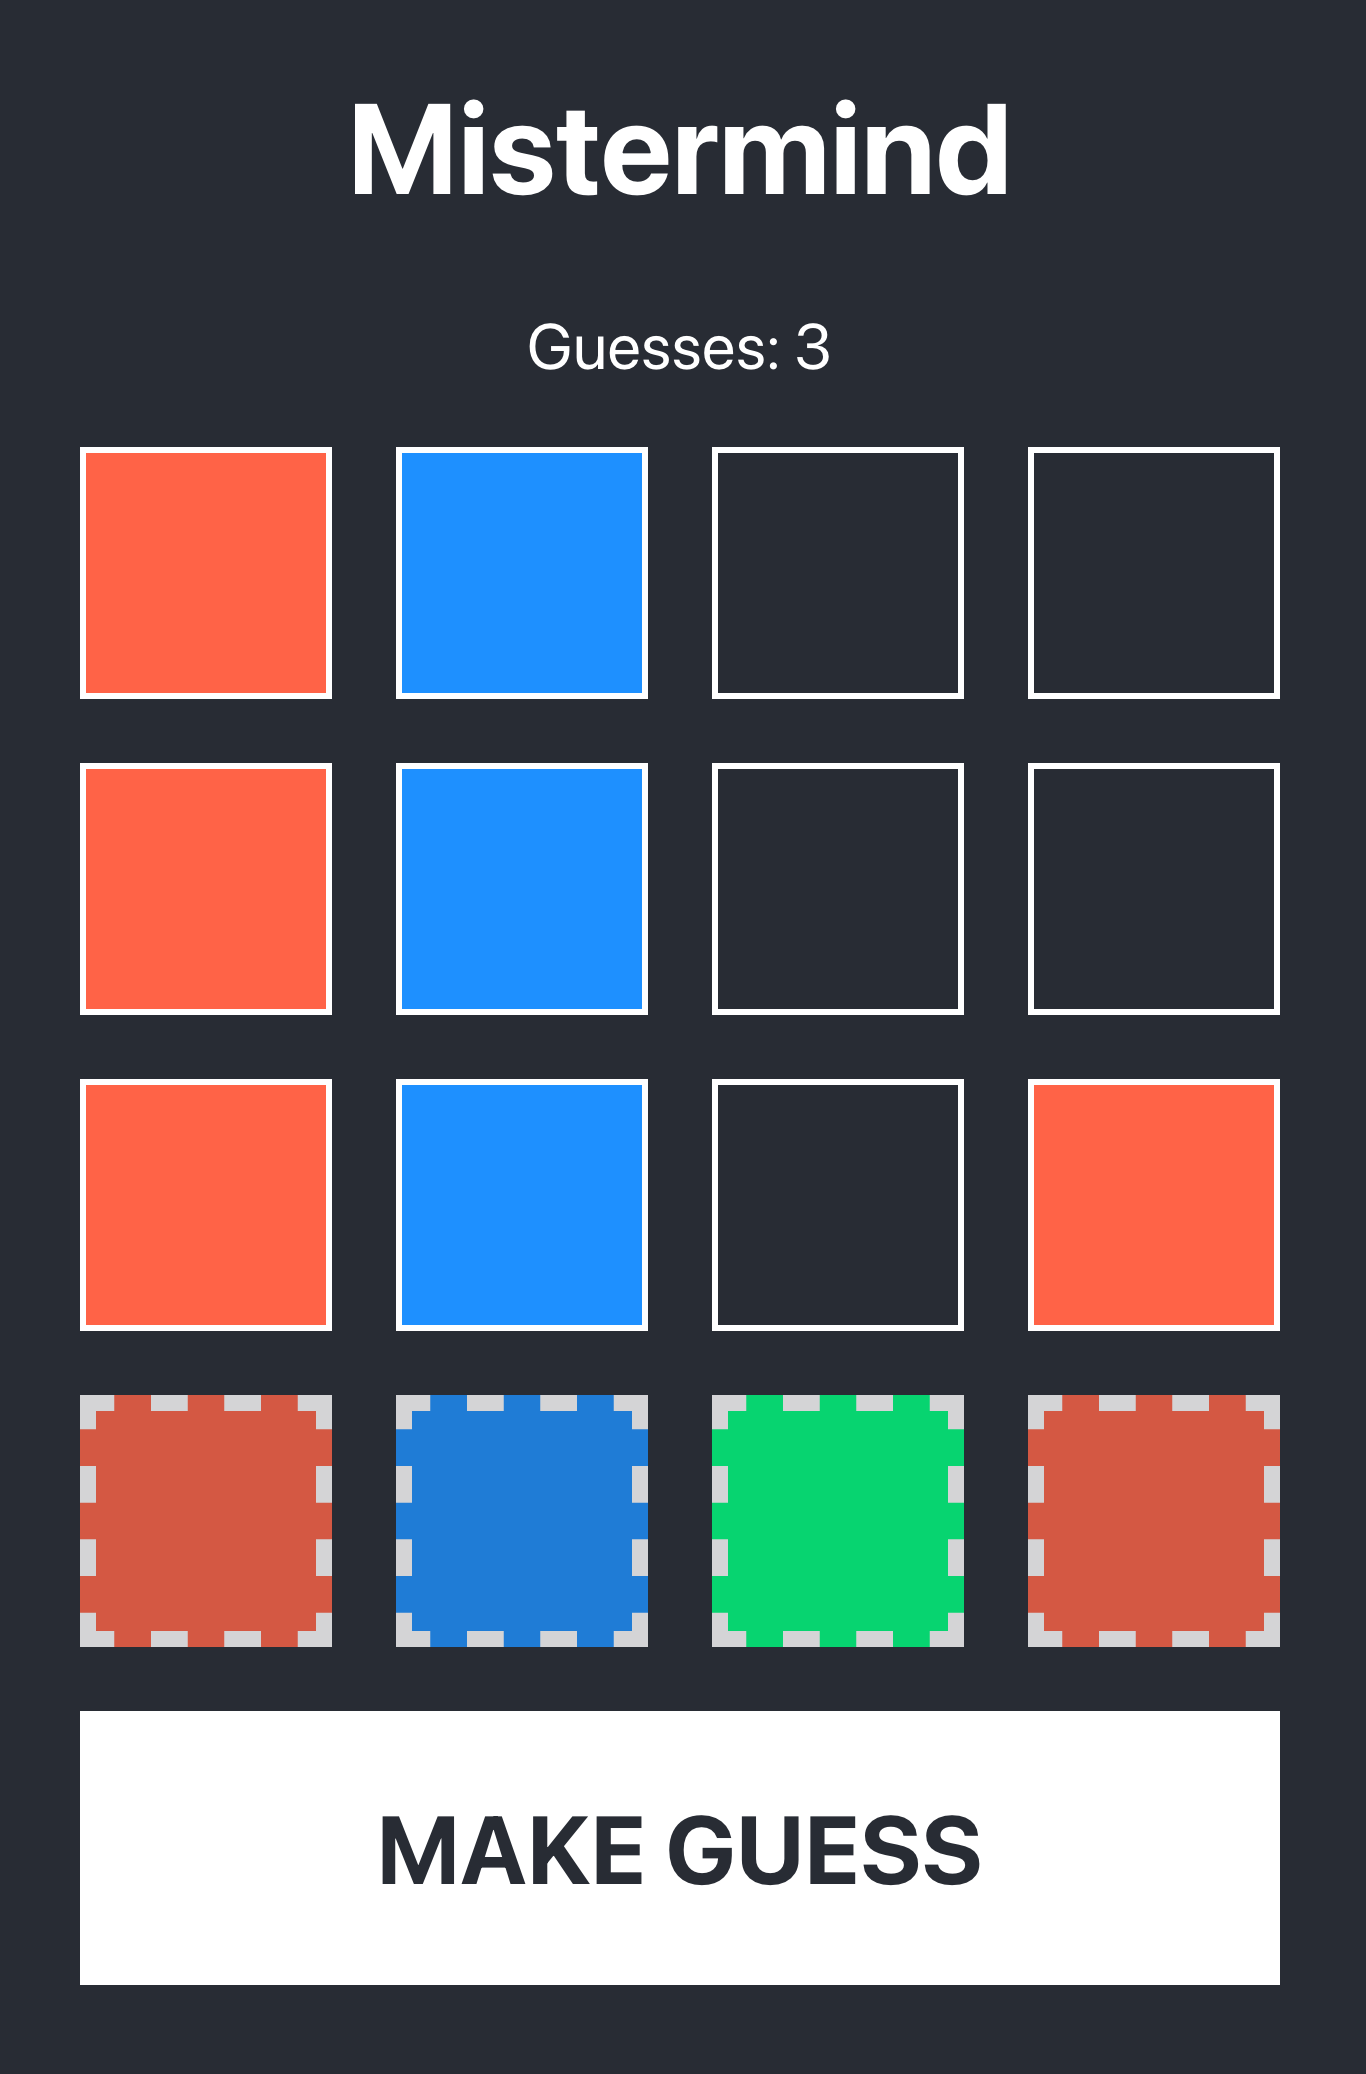
With a few less steps than create-react-app, we have a React project up and running. This one even comes with Hot-Module Replacement. Sweet! At this point, I’m going to change out the default app for my own. Wordle is super popular right now, which reminds me of the game Mastermind that I played as a kid. I wrote up a similar game I’ll be calling Mistermind. I did everything using local react state with useState hooks. I’ll push this up to this GitHub repo so you can check it out!
Elm
I adore Elm. I needed to get that off of my chest. It’s great and I need to be able to use it with Vite, if I’m going to use it! Luckily, this repo, hmsk/vite-plugin-elm promises to provide Elm support. I’ll start by running the install command.
npm i -D vite-plugin-elmAfter running this, I’ll update vite.config.js to include the new elm plugin. This leaves the vite config looking as follows:
import { defineConfig } from 'vite';
import react from '@vitejs/plugin-react';
import elm from 'vite-plugin-elm';

// https://vitejs.dev/config/
export default defineConfig({
  plugins: [react(), elm()],
});
At this point, I would like to use an Elm to hold some of the app state for the app. This is a bit contrived, since I’m only going to be moving past guesses/turns in there. If you want to learn more about using React & Elm in tandem, I just wrote a post about it! In our main.jsx, I’ll import the Elm component I created and pass the ports to the React app below.
const appState = Elm.AppState.init({
  node: document.getElementById('elm-root'),
});

ReactDOM.render(
  <App ports={appState.ports} />,
  document.getElementById('root')
);
Then back in the React component, we’ll hook it up and save. Now for the moment of truth. We have to stop and run npm run dev again to pick up the plugin changes. After that we have a clean console and can go back to localhost:3000.
Sweet! Without any more work than installing and turning on the plugins, we have React and Elm working in tandem. And with that, let’s take a turn towards deployment.
🚀 Build & Deployment
First, let’s just build the static site using the npm run build command included with Vite. After running this, a dist folder is created containing the static assets for our Vite app. Nice. 😌
npm run buildThe Vite website has a guide on deploying to Github pages, which is what I’m shooting to do. However, rather than run a deploy script, I’m just going to run the build and set GitHub pages to point to the /docs folder in settings. You can see this up and running here! Although this worked pretty much right out-of-the-box, I did hit one snag with the base URL. Even though they mention it, I forgot to set the base option in my Vite config.
I’m hosting the app at abshierjoel.github.io/mistermind. Knowing that, I only need to set the base option to that directory to get that to work. To do that, open up vite.config.js one more time and update the defineConfig call to look like this:
export default defineConfig({
  base: '/mistermind/',
  plugins: [react(), elm()],
});
🎉 Conclusion
In conclusion, Vite is sick. Obviously this has been a fairly simple example of a static site, but I find myself creating a lot of those. But after this, I’ll definitely be spending more time with Vite to see if it can fully replace Webpack for me and save time configuring. I do hope my first swing at this has been helpful to anyone else wanting to take a look at what Vite has to offer. I’m excited to learn more, so if you’re a little further along on your Vite journey than I am, I’d love to hear from you down below.
Thanks for reading,
– Joel Abshier
React was one of the first front-end frameworks I worked with. Soon after, I found Elm and I absolutely fell in love with it. Then my team and I started to move apps from React into Elm. This is a pretty fun problem, because there are a few ways to go about it: have Elm consume the React App piece by piece; have React consume the Elm App piece by piece; or replace the app entirely. I noticed there isn’t a lot of recent work on this topic. So I wanted to make a guide for anyone trying to make this transition. Elm is a wonderful language and so is React, so being able to use them in tandem is a powerful choice!
If you’ve used React, you most likely have used (or got started with) our friend, create-react-app. And if you’ve used Elm, you may have used the similar package, create-elm-app. Both of these packages are a great way to get started developing with Elm & React quickly, without going through the work of setting up a custom environment. They both provide eject, a script that permanently changes your create-LANG-app from a single-dependency on the tool, to all of the packages that bundle includes with their respective configurations.
For the purposes of this article, I’m going to assume you have some familiarity with React. As for Elm, I will write all the steps assuming you’re new to the language. And even if you’re already familiar with Elm, this should be helpful guide for transitioning between the two.
Code in Github – Elm React Components Package – Learn Elm Here
🌱 Getting Things Ready
Before we begin to replace any React with Elm, we will need to get Elm setup on your system. Head over to the Elm install instructions and download it for your OS. Once you’ve done that, jump into your existing React project. For this tutorial, I’ll use my own simple todo list app built on Webpack 5 with Webpack Dev Server. The full source for this is available in my GitHub repo.
If you bootstrapped with create-react-app, now is the time to run npm eject. Remember, this cannot be undone. Once you’ve done that you can either run npm i elm or add the following line to your package.json:
"elm": "^0.19.1-5"Don’t forget to update the version to whatever is most current. As of writing, this is the most recent npm package.
After that, we’ll need to generate an elm.json file by running the elm init command in the root directory (same place as package.json) of your project.
elm initFinally, let’s add the elm-webpack-loader to our webpack config. We’ll install the packages and then add them to our webpack config.
npm i elm elm-webpack-loader elm-hot-webpack-loaderYou can find this under config/webpack.config.js. Scroll down to module.rules and add a new rule before the test for js|mjs|jsx|ts|tsx. There’s more to configuring elm-webpack-loader than I’m going to show here, but the following code will get you up and running:
{
test: /\.elm$/,
exclude: [/elm-stuff/, /node_modules/],
use: [
{ loader: 'elm-hot-webpack-loader' },
{ loader: 'elm-webpack-loader' },
],
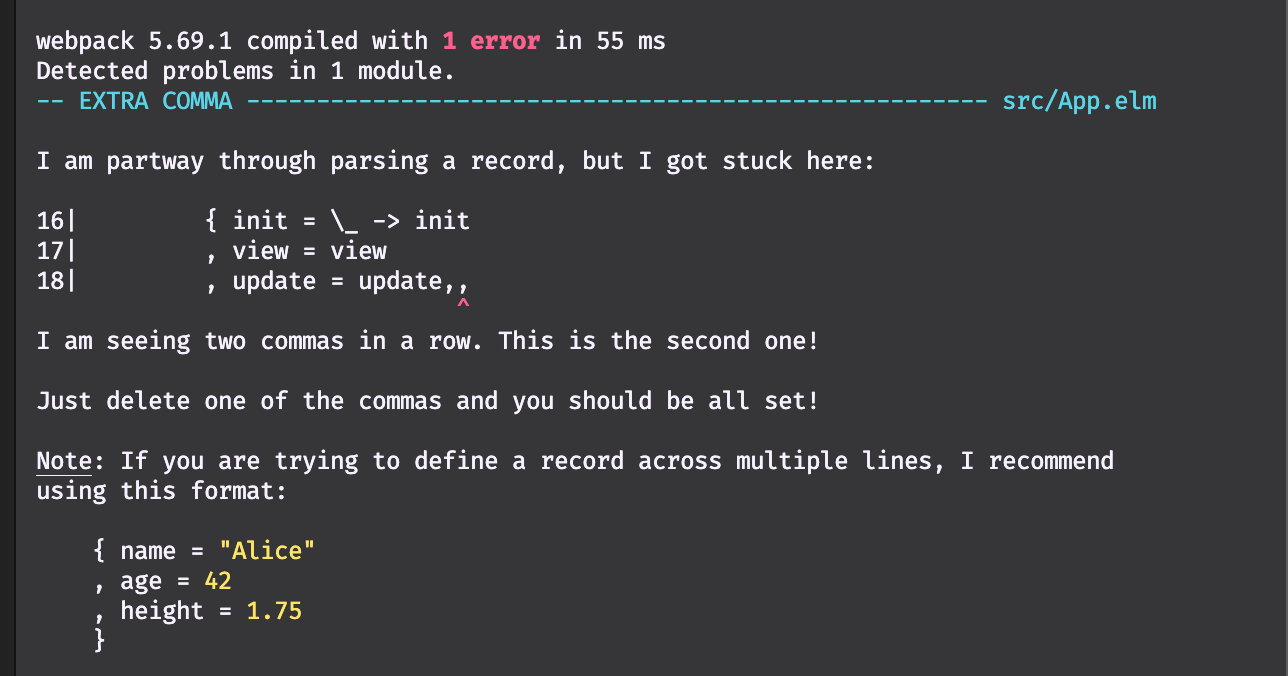
},And with that, you have successfully set up your project to have both React and Elm apps. Yay for you! 👏 The best verification we can have is looking at the Elm compiler, which has started a nice conversation about a bug in my Elm app:
⚛ → 🌳 Replacing a React App with an Elm App
In a perfect world, we could just replace our React App with our Elm App. While this probably isn’t the most likely case, it is an option I have used many times. This is especially good for simple apps or just low-risk ones. One amazing benefit of Elm is that there are no runtime exceptions, so you won’t be risking the entire app breaking when you deploy.
To get started, create a file called App.elm in src. This will replace your App.js. The React code for this example app is over on GitHub. Below is the Elm version of the app:
module App exposing (main)

import Browser
import Html exposing (Html, div, form, h1, input, li, text, ul)
import Html.Attributes exposing (class, type_, value)
import Html.Events exposing (onInput, onSubmit)


---- PROGRAM ----


main : Program () Model Msg
main =
    Browser.element
        { init = \_ -> init
        , view = view
        , update = update
        , subscriptions = \_ -> Sub.none
        }


init : ( Model, Cmd Msg )
init =
    ( initialModel, Cmd.none )


initialModel : Model
initialModel =
    { items = []
    , inputText = ""
    }


---- MODEL ----


type alias Model =
    { items : List String
    , inputText : String
    }


type Msg
    = ChangedText String
    | SubmittedForm


---- UPDATE ----


update : Msg -> Model -> ( Model, Cmd Msg )
update msg model =
    case msg of
        ChangedText text ->
            ( { model | inputText = text }, Cmd.none )

        SubmittedForm ->
            let
                items =
                    model.inputText :: model.items
            in
            ( { model | items = items, inputText = "" }, Cmd.none )


---- VIEW ----


view : Model -> Html Msg
view model =
    div [ class "App" ]
        [ h1 [] [ text "Todo List" ]
        , viewTodos model.items
        , viewTodoForm model.inputText
        ]


viewTodos : List String -> Html Msg
viewTodos items =
    ul [] (List.map (\item -> li [] [ text item ]) items)


viewTodoForm : String -> Html Msg
viewTodoForm inputText =
    form [ onSubmit SubmittedForm ]
        [ input [ type_ "text", onInput ChangedText, value inputText ] []
        , input [ type_ "submit", value "Add" ] []
        ]
With that in place, let’s hop into our index.js file and change the ReactDOM.render(...) call to one to initialize Elm. First, import the Elm app at the top of the file:
import { Elm } from './App.elm';You can then call Elm.MODULE_NAME.init(...) to tell Elm which DOM node to initialize on.
Elm.App.init({ node: document.getElementById('root') });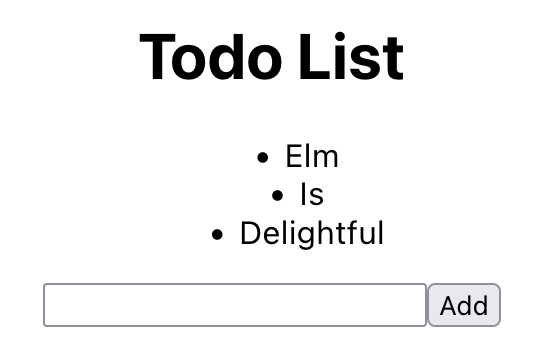
And with that, the React App will be replaced with a shiny new Elm App to track our todo items. But it’s not always the case that a full replacement is the best or safest way to transition from React to Elm. Let’s take a look at slowly consuming a React App with an Elm App.
🌳 > ⚛ Consuming a React App within an Elm App
Although there isn’t a great way to load a React component within an Elm app, Elm provides ports to let us interact between the two. My favorite way to move a React app into an Elm app is to move the app state into the Elm app and then slowly consume the behaviors of the React app. In this example we’ll put the list items in the Elm app, but we will leave displaying the list and adding new items to the React app. Let’s get started by created an elm app in App.elm with a model to hold the list.
module App exposing (main)

import Browser
import Html exposing (Html, div)


---- PROGRAM ----


main : Program () Model Msg
main =
    Browser.element
        { init = \_ -> init
        , view = view
        , update = update
        , subscriptions = \_ -> Sub.none
        }


init : ( Model, Cmd Msg )
init =
    ( initialModel, Cmd.none )


initialModel : Model
initialModel =
    { items = []
    }


---- MODEL ----


type alias Model =
    { items : List String
    }


type Msg
    = SubmittedForm


---- UPDATE ----


update : Msg -> Model -> ( Model, Cmd Msg )
update msg model =
    ( model, Cmd.none )


---- VIEW ----


view : Model -> Html Msg
view _ =
    div [] []
To pass data to/from JavaScript to Elm, we’re going to need to add two ports. On the first line of App.elm add port before module. This leaves us with port module App exposing (main). Now let’s add two ports, one for receiving a string from JavaScript to add an item and the other for passing a list of strings back to JavaScript for displaying them. These two ports look like this:
port addItem : (String -> msg) -> Sub msg

port sendItems : List String -> Cmd msg
Now let’s add the behavior for adding a new item to our update function. This implementation looks almost identical to the one for replacing the elm app, except our SubmittedForm type will also contain a string. We’ll have this value passed in from JavaScript and then call sendItems with the new list of items to update our React app.
type Msg
    = SubmittedForm String

update : Msg -> Model -> ( Model, Cmd Msg )
update msg model =
    case msg of
        SubmittedForm newItem ->
            let
                items =
                    newItem :: model.items
            in
            ( { model | items = items }, sendItems items )
The last thing to do is to add a subscription which will be called whenever the addItems port is sent from JS. Change our Browser.Element function to call subscriptions = subscriptions and then create a new subscriptions function below. This function will call our addItems port with the local Msg to send the string to. That function is SubmittedForm and the implementation is as follows:
subscriptions : Model -> Sub Msg
subscriptions _ =
    addItem SubmittedForm
JavaScript & React
That’s all there is to do on the Elm side of things. Now let’s shift our focus back to our index.js file. We’re going to render both our Elm App and our React App, but the Elm app will only be responsible for holding the state. First, we need to assign the Elm app init call to a variable so that we can access our ports. Once we have that, we can pass the ports into our React component as props.
const elmApp = Elm.App.init({ node: document.getElementById('elm-root') });

ReactDOM.render(<App ports={elmApp.ports} />, document.getElementById('root'));
The last step is to update our React component to use the Elm ports. Because our addItem port takes a string, the only change we have to make in the React component is to replace our addItem function with a reference to ports.addItem.send. We first get ports by destructuring it from props.
const App = ({ ports }) => {
  const [items, setItems] = useState([]);
  const addItem = ports.addItem.send;

  ...
}
To receive the updated list of items from Elm, we’ll need to subscribe to our sendItems port. This subscription will pass a list of items, which I will just put in local state using a useState hook.
ports.sendItems.subscribe((items) => setItems(items));And with that, we have successfully moved our React app state into an Elm app, which will allow us to take it apart piece by piece, until we only have the Elm app left. If I were to continue this, the next thing I would do would be to move the list display into the Elm app. Finally, we could move the form over and eliminate the React App altogether.
⚛ < 🌳 Consuming an Elm App within a React App
Finally, there is the option of keeping the main app in React and slowly pulling in parts of Elm. I don’t prefer this method, because Elm doesn’t have a component-based model like React. In my opinion, it makes this a less natural transition. That being said, sometimes I find that this is the best way to go for a large and complex React app. There is a pretty nifty npm package that let’s you use an Elm app as a React component. If you don’t like this solution, you can use ports like we did in the previous example. Ports might be the better option, but this package will let us get running quickly. And since we’re talking about transitioning to Elm, the faster choice seems better to me.
Go ahead and run npm i @elm-react/component. This package includes the function wrap that will let us wrap our Elm app in a React component that will convert props into the ports we define in our Elm app. Pretty cool, right? At the start of our App.js component, import the function and our Elm app.
import wrap from '@elm-react/component';
import TodoList from './TodoList.elm';
After that, we can define a new component by passing our Elm app to the provided wrap function.
const TodoListComponent = wrap(TodoList);And with that, you can use <TodoListComponent /> within JSX, just as if it were a React component. Let’s replace the <Todos /> react component with our elm one.
<TodoListComponent updatedItems={items} />updatedItems will be the name of the port in our Elm app. This port will work exactly like the subscription we created in the previous example.
The Elm “Component”
Let’s hop back over to our Elm app and change it to a port module on the first line. This leaves us with the full component looking like this:
port module TodoList exposing (main)

import Browser
import Html exposing (Html, li, text, ul)
import List


---- PROGRAM ----


main : Program () Model Msg
main =
    Browser.element
        { init = \_ -> init
        , view = view
        , update = update
        , subscriptions = subscriptions
        }


init : ( Model, Cmd Msg )
init =
    ( initialModel, Cmd.none )


initialModel : Model
initialModel =
    { items = []
    }


subscriptions : Model -> Sub Msg
subscriptions _ =
    updatedItems NewItems


---- PORTS ----


port updatedItems : (List String -> msg) -> Sub msg


---- MODEL ----


type alias Model =
    { items : List String
    }


type Msg
    = NewItems (List String)


---- UPDATE ----


update : Msg -> Model -> ( Model, Cmd Msg )
update msg model =
    case msg of
        NewItems items ->
            ( { model | items = items }, Cmd.none )


---- VIEW ----


view : Model -> Html msg
view model =
    ul [] (List.map (\item -> li [] [ text item ]) model.items)
First take a look at line 42, where we define the port updatedItems. This name needs to match the name of the prop we passed into our wrapper React component. Because we’re passing in an array of strings, we’ll make it a List String type in Elm. Then we’ll define our subscriptions function, as we did before, to call updatedItems with the NewItems Msg we define below.
NewItems has a List String argument, which will match our port. Lastly, we move to our update function to define the behavior when a NewItems Msg is received. We’ll take in the list as items, locally, and we’ll update the local model state to this new list.
Then for our view we need only to display a list of the items in our todo-list. This will be a simple ul with a map of the list items. And that’s it! Startup the app and you should see the list displayed in Elm, while maintaining the state in the React app.
🌳 Conclusion
I hope that’s enough to get you up and running. Any way you go about it, I think the tooling is really great for Elm’s interop with JavaScript. In my opinion, keeping your interactions between the two to a minimum is best, because you’ll be missing out on the amazing runtime safety that Elm offers. That’s one of the biggest draws to Elm for me, so I try not to use ports as much as possible. However, you definitely have to, and being able to make the two interact while replacing an app is vital. So I think any of these methods would serve you well.
I prefer to put my app state into Elm and use React for interactions. Essentially eating the app from the top down. But the elm-react-components package is fantastic and easy to use, so if you’re wanting to start there, especially if you’re new to Elm, I think it’s a great option.
Best of luck! Happy Elming.
Footnote: Msg and msg
While reading this, it occurred to me that I change between Msg and msg regularly in Elm. When I was learning Elm I found this to be pretty confusing, so I wanted to clarify. In Elm, Msg is a concrete type that you define in your module. In all of the Elm examples here (and most places) you’ll see a type Msg line right above our update function. These are all of the events that can update the app’s state.
The lowercase, msg, on the other hand can be any type. You can think of it as a placeholder for “any” type that may later exist. This is exemplified in the view functions in this code. In the case that the Elm app had to handle state updates, the type was Html Msg, because the DOM would call a Msg to update the todo items when a form was submitted. However, in the 3rd case, I used Html msg, because there are no events in our Msg that the DOM would call.
January has already slipped out of our hands, as have most of our New Year’s resolutions and habit goals. The momentum and excitement around our ambitious goals that were flooding our timelines not long ago have vanished. Maybe you were part of this annual movement and had your own collection of dreams to reach this year; and just maybe you’re on course; or perhaps you’re already a month into stopping trying. While I’ve never been much for New Year’s Resolutions, I’m no stranger to setting goals and not quite reaching them. But I’m hoping for something different this year.
✔ Last Year’s Goals
Last year, during February and March I set out to build better habits in my life: eating well, exercising, reading, waking up early, etc. I decided not to focus on big goals, but instead to focus on being consistent with what I call the doing of the habit. In this process of this, I kept hearing about this book called Atomic Habits from a bunch of productivity Youtubers. Curious enough, I picked it up. I ended up reading it twice last year and applied one of the book’s main ideas to my habit building. James Clear, the author, suggests building systems, rather than setting goals, which is the path I had started down already. And although I did have several failures, I consider this as one of the best years for accomplishing personal goals.
Some of those goals, like having a more regular sleep schedule and eating better went exceptionally well. Exercising regular went very well for the summer months, but once November rolled around and it got cold, this fell off the rails and I have yet to pick it backup. And although I did read a lot more than I have in years past, I often would miss several consecutive weeks before picking a book back up. In the Spring I also picked up recording cover songs and uploading them to my YouTube channel. I stuck with this pretty consistent up until October, where my time became a bit more limited. During this time I changed jobs, and made an intentional decision to take a break.
👀 Looking At This Year
So overall it was a really successful year, but it still had its failures. This year, I am hoping to set some more specific goals and stick to them. I would like to be a year where I can explore some more creative avenues – music & writing in particular; this blog is part of that goal. I’ve considered focusing on just One Thing, but in my current situation, it makes sense to break it out into a few habits. To help me build these habits, I will continue to focus on systems. But I will also tie these systems to some “recurring goals.” I hope these goals will provide me some excitement to keep working towards building these systems. The three areas I’m hoping to build habits in are Writing, Finances, and Music. Let’s break down how I hope to accomplish this.
✍ Writing
Habit: Write daily through blogging and Object Writing
Recurring Goals: Publish at least a monthly blog post on here or Taco Tandem
I’ve never considered myself to be a good writer. Back in school and university, I had to build myself up to writing because I had so much dread. Funny enough, even though I hated it so much, once I would start writing, I could often find myself writing far longer papers than required. I would reach a flow state and the words came easily to me. Outside of this, I’ve always enjoyed writing songs, but have often found myself to go through phases. I can write a lot of songs one month, but then go through a 6-month drought where I can’t write a single lyric.
The motivation behind this goal is to break that drought. I love songwriting and would really like to make it something I can do more regularly (more on this later). Additionally, I would really like to start sharing some of my life and the things I learn online. I think that blogging is the best application for this, which is why you’re reading this today. Since I started my other blog, Taco Tandem, I find that I can enjoy writing a lot, given the right context. And although I haven’t written much for this blog yet, I’ve really enjoyed the posts I have made.
The Writing Habit
The habit I would like to build is daily writing. I believe will improve my ability to express my thoughts and stories. I also believe that the more regularly I can do this, the more I will enjoy the hobby. A few years back I read the book Writing Better Lyrics by Pat Patterson. It’s an incredible book that provides a great tool call Object Writing. Object writing is a writing exercise where you’re given a random word and you write for 10 minutes straight, stopping immediately when the timer rings. During this time, you are allowed to take your writing any direction, but are encouraged to tap into the seven senses: sound, smell, touch, taste, sight, kinetic, and internal/organic. I will use this exercise combined with writing for this blog to help me build this habit.
💰 Investing
Habit: Watch + Understand Stock Markets and Invest Regularly
Goal: Invest a large portion of income in 401k, Roth IRA, or index funds
Money is a weird topic for me. Though I don’t remember being taught this, the subject always has seemed a bit taboo to discuss. However, over this past year I’ve been working to educate myself better on saving and investing. I’ve never been one for budgeting or making a financial plan, but I have always leaned towards being conservative with spending while saving as much as possible.
At the job I started in 2020, they offered a 401(k) match up to 5%, so I decided to take full advantage of it, since it is basically free money for saving that. Since that time I have been keeping up with a 401(k) as well as investing in a Roth IRA. I made these choices somewhat blindly, but afterwards starting to research more about investing. This was the first time I took the time to watch markets and learn about movement. It has been a weird time to get involved in investing, given the chaotic behavior of the market since the start of the pandemic.
The Investing Habit
This year, I would like to build a better habit of watching the markets and studying their behavior better. My goal isn’t necessarily to try to time anything to buy stocks, but just to build more intuition about the market’s behavior. I also want to build a habit of investing regularly. I’m fairly new to investing, so I believe index funds are the safest way to put money in and leave it for the future. My 401(k) and Roth IRA contributions come out at every paycheck, but I am manually investing every quarter. I believe this will let me get involved in the market, but also try to take advantage of small dips in a fund, on any given week. This might be foolish to try to time it, but for the most part, I’m planning on putting the same amount in 4 times this year.
The goal is pretty vague here, but I would like to invest a very large portion of what I make into savings. Right now, I’m set to invest around 20% and am undecided about how to save the remaining amount. As I learn more, I’ll be sharing my plans here on this blog, so stay tuned. 😉
🎙 Music
Habit: Build a daily habit of object writing and practice new music weekly
Goal 1: Publish original songs on Spotify/Amazon Music
Goal 2: Continue uploading cover songs on my YouTube channel
As I mentioned before, last year I started regularly uploading cover songs to my YouTube channel. I have found the process of arranging music and recording songs to be extremely rewarding. While making each song, I usually run into a few new issues that inspire new ideas. I enjoy the process of making music as well as the videography required to put together the songs. Each song required several camera angles, so I can get lost in the edit for quite a while.
I would like to rebuild the habit of uploading cover songs to that channel. Although I don’t expect that I’ll be able to release songs weekly, as my channel banner promises, it’s something I want to carve out time to accomplish. I would also like to record my own music to publish to streaming platforms like Spotify & Amazon Music.
The Music Habit
The hard thing about these habits is that it seems impossible for me to put a time on how long it takes to finish a song. Sometimes I can knock out the instrumentation in a few short hours, whereas other times it takes a few evenings. Then recording and editing the video can also vary greatly in timing. This makes it hard to set any specific goals, so I’m focusing on just making it regular. As a rough idea, I would like to put out about an album’s length of original songs over the course of the year (though I will release them all as singles). So hopefully 9-12 songs will be out on streaming services along with a collection of new covers on YouTube.
🍀 Wish Me Luck
So, that’s the plan! It’s hard to judge at this point what I’m going to be able to accomplish, but I’m hoping that by writing it down and publishing it, it’ll give me a kick to keep going on all of these. If you have any strategies, book recommendations, or encouragement, I’d love to hear it in the comments below! Wish me luck! 🤞
This week I had received a code review from a teammate to add a @spec to a start_link function I wrote for a GenServer. My start_link function will take a keyword list, try to get the values :first_name and :last_name with defaults, and then call GenServer.start_link/2 with __MODULE__ as the module and those values as the initial state. This GenServer looks like this:
defmodule JoelServer do
  use GenServer

  def start_link(opts \\ []) do
    first_name = Keyword.get(opts, :first_name, "Joel")
    last_name = Keyword.get(opts, :last_name, "Abshier")
    initial_state = %{
      first_name: first_name,
      last_name: last_name
    }

    GenServer.start_link(__MODULE__, initial_state, opts)
  end

  def init(state) do
    {:ok, state}
  end
end
What I would like to do is add a @spec to describe how to use this function. Luckily, in Elixir we have Dialyzer to make this easy. Dialyzer is a static analysis tool within Erlang/Elixir. One feature of Dialyzer is to suggest @spec annotations for a function. Let’s see what it thinks for this:
@spec start_link(keyword) :: :ignore | {:error, any} | {:ok, pid}
def start_link(opts \\ []) do
  ...
end
While that’s correct, a more specific @spec is valuable to us. Let’s look at how we can do that.
📨 Arguments / Input Type
Let’s take a look at the keyword list we’re passing in. It technically doesn’t matter to us which options are passed in, in addition to :first_name and :last_name, however if the spec were to define those specific keywords, we could catch any issues and/or typos while writing the code. Let’s define a private type that lists our keywords. First, add the typep definition and then update the @spec accordingly.
@typep start_opt :: {:first_name, String.t()} | {:last_name, String.t()}
@spec start_link(opts :: [start_opt]) :: :ignore | {:error, any} | {:ok, pid}
def start_link(opts \\ []) do
  ...
end
Now if you try to call JoelServer.start_link(title: "Mr.") you’ll get a Dialyxir warning saying something like this:
([{title, <<77,114,46,32>>}]) breaks the contract (options::[start_opt()])That’s pretty cool! Now the next time someone on my team has to use this GenServer, they’ll be told exactly how to use it while calling it. But what about the return type?
📬 Output / Return Type
Now for the reason you’re here. A co-worker pointed me toward a type in the GenServer docs on_start/0. We can use this to replace the list of return types at :ignore | {:error, any} | {:ok, pid}. This lets us define our start_link with the return type as Elixir’s GenServer.start_link.
@spec start_link(opts :: [start_opt]) :: GenServer.on_start()I love this, rather than managing our own list of types for each GenServer I define. If you’re working with a Supervisor, we are also given Supervisor.on_start/0. If you want to allow any options allowed by a GenServer or Supervisor, you’ll also find options/0, option/0, init_option/0, and so on.
🐰 That’s all the GenServer we have today, folks
Anyhow, this might be pretty basic, if you’re familiar with Elixir. But I thought it was exciting to be told about these and wanted to share it. A lot of Elixir packages, especially the core library, have excellent hexdocs, so I’m going to make a habit of paying closer attention to the @specs on them for when I can take advantage of types like this.
I’ll probably be writing some more shorter posts like this. It’s a bit basic, but I’ll just make a Today I Learned category here on the blog, so you can check those out.
If you have any short tips like this I’d love to hear about them. I’m new to the language, so I’d love to learn! Thanks for reading! 🧪
– Joel Abshier
“Flow allows developers to express computations on collections, similar to the Enum and Stream modules, although computations will be executed in parallel using multiple GenStages” [Flow HexDocs]. This allows you to express common transformations (like filter/map/reduce) in nearly the same was as you would with the Enum module. However, because Flow is parallelized, it can allow you to process much larger data sets with better resource utilization, while not having to write case-specific, complex OTP code. Flow also can work with bounded and unbounded data sets, allowing you to collect data and pipe it through a Flow pipeline.
🥚 An Anecdotal Experience with Flow
Last summer, about 3 months into learning Elixir, I found myself in the middle of a project where I needed to collect product data from 5 different tables in a MSSQL Database and build a NoSQL database of products. I needed to process over 400,000 products daily. In addition to flattening the data, business rules for pricing, shipping restrictions, swatch options, etc. needed to be applied. We then shipped the data to our search provider, Algolia (amazing product btw). So let me use this story to make a case for Flow.
A co-worker of mine took an initial attempt at this project using NodeJS, but after getting about halfway through, we were already certain that it would not be performant enough. At this point we decided to develop the data processing pipeline in Elixir. Because we were both new to the language, we used Elixir’s Enum.map/2 and Enum.reduce/3 liberally, without any application of OTP. Surprisingly, we found that even with our extremely basic setup we were able to cut the time of the job down from over three hours to about 15 minutes.
Flow to the rescue!
However, we still weren’t completely satisfied with the performance of the tool, and we wanted to apply OTP to make the processing of our products concurrent. After reading Concurrent Data Processing with Elixir we decided to use Elixir’s Flow package combined with a series of GenStages. Our GenStages were fairly simple, consisting of a producer responsible for pulling product ID’s from a service bus, a consumer/producer responsible for collecting the product data from the database tables, another consumer/producer responsible for applying business rules and flattening the product data, and a consumer responsible for saving the data to the NoSQL database.

We do most of the data transformations in the second producer/consumer. This is where we applied our business rules for pricing, shipping, etc. and flattened our data. Underneath this Producer/Consumer we used Flow to add more concurrency to the processing. After massaging some of the parameters for how many concurrent processes Flow will use, we were able to process all of our product data in about 30 seconds, down from over 3 hours from NodeJS (which isn’t really a fair comparison, but aren’t big numbers are fun).
🐣 Your First Flow Pipeline
Let’s take a look at the power that Flow can provide you without much overhead. In this example, we’re going to be looking at a dataset of information on every DC Comic Book release. You can download it for yourself over here to follow along. Let’s create an application to go through the dataset and get the list of comics written by each specific author. I’m going to treat comics with multiple authors as a unique author, for simplicity’s sake. Start by creating a new mix project:
mix new comic_flow --module ComicFlowLet’s navigate into the root directory and run iex:
cd /comic_flow
iex -S mix
Leave that for now and let’s open up lib/comic_flow.ex. In here, you can remove all of the code within the module and replace it with a new function called get_writers.
defmodule ComicFlow do
  def get_writers do
    # TODO
  end
end
The file we’re going to read is in CSV format, and that’s going to need decoding. Rather than try to figure that out, let’s add the CSV package from hex.pm to our mix.exs file.
{:csv, "~> 2.4"}Now, back in get_writers we can read the data a stream:
File.stream!("dc_comics.csv")And then we can call CSV.decode!/2:
File.stream!("dc_comics.csv")
|> CSV.decode!()
This next step is a little bit nasty, but it’ll work for the sake of example. The 2nd column of our CSV is the name of the comic and the 7th is the writer. We’re going to reduce over the list of comics and create a map of authors with their list of comics. This gives us a final get_writers function that looks like this:
  def get_writers do
    File.stream!("dc_comics.csv")
    |> CSV.decode!()
    |> Enum.reduce(
      %{},
      fn [_cat, name, _link, _pencilers, _artists, _inkers, writer | _tail], acc ->
        Map.update(acc, writer, [name], &[name | &1])
      end
    )
  end
Let’s test
Perfect! Let’s go back to our iex terminal and run this code. I’m going to time it using the Erlang :timer.tc function. To time function calls, I’m using this method. If you want to learn, that’ll take you about 2 minutes to read. I got an average time of ~171.25 seconds, with a minimum of 65 seconds and a max of 244.
Ouch. I’m not happy with that time, especially if the dataset gets larger. And if DC keeps releasing comics every year, it’s just going to get progressively worse. Enum has to load everything into memory in one fell swoop before reducing. When this happens, not many system resources are being used, as we’re just waiting for the entire stream to be read in. But what if there was a way reduce over our collection while the stream was still read in? That’s where Flow comes in. Let’s start by converting our stream into a Flow.
To Flow we Go
def get_writers do
  File.stream!("dc_comics.csv")
  |> CSV.decode!()
  |> Flow.from_enumerable()
  |> Flow.partition(
    key: fn [_cat, _name, _link, _pencilers, _artists, _inkers, writer | _tail] ->
      writer
    end
  )
end
Flow.from_enumerable/1 does the work of converting our data into a Flow, using the collection as the producer for the pipeline. There are options to configure the parallelization of the pipeline, but for now we can leave it without arguments. The next step is the Flow.partition/1 function. Partition is probably the trickiest function to use in Flow. In a simple case, like a tuple, it will default to taking left as the key. In our case, we want to specific the key that the partitioning will happen on, which will create the right hash tables. I like to think of this as “creating a path to the key.” In our example, the data is just a list, so we’ll destructure writer and return it back as the key.
Enum.Reduce -> Flow.reduce
Finally, we’ll convert our Enum.reduce into Flow.reduce. The functions are largely the same, with the primary exception being that Flow’s reduce has a function to return the initial accumulator, as opposed to the enumeration given to Enum.reduce.
def get_writers do
  File.stream!("dc_comics.csv")
  |> CSV.decode!()
  |> Flow.from_enumerable()
  |> Flow.partition(
    key: fn [_cat, _name, _link, _pencilers, _artists, _inkers, writer | _tail] ->
      writer
    end
  )
  |> Flow.reduce(
    fn -> %{} end,
    fn [_cat, name, _link, _pencilers, _artists, _inkers, writer | _tail], acc ->
      Map.update(acc, writer, [name], &[name | &1])
    end
  )
  |> Enum.to_list()
end
And lastly you’ll notice that we called Enum.to_list() Calling this function will execute the Flow in parallel and return back the file result. You can also use Flow.run(), but it will return an atom indicating success/failure, rather than the data from the flow.
After changing to Flow, the time to run through all of DC comics is now averaging 2.902 seconds. That’s about 1.7% of our initial time! Wow! That’s pretty cool.
🐥 Unleash the Flow
On one hand, there is a lot more to learn with flow and I’m sure you’ll run into some odd situations along the way where you’ll have to duke it our with Flow.partitiion, but on the other hand, you’re now mostly equipped to start implementing reliable, concurrent code with Flow. And the best part is, you didn’t have to wrap your head around the systems required for this concurrency, you are simply able to utilize functions that are nearly identical to the functions you already use on collections delay.
I’ve personally had a ton of fun using Flow for work and for sport. Like all things, Flow isn’t a silver bullet, and there are many times I still need to write concurrent code. However, for many applications, using Flow would provide a path to running highly-concurrent code without having to juggle a lot of complexity and without having to pay the price to build those solutions from scratch. Hopefully you can find a place for Flow in your own projects!
👋 Welcome
Hi, I’m Joel! Thanks for coming to my blog. This is the first post of (hopefully?) many. I’m hoping to create a blog to share my thoughts on software engineering, technology, and life. Introductions are a little awkward, since I’m not sure that there is a specific thing to share, other than who I am. So, rather than give a biography on myself, I thought I would just give you a rundown of how I got interested in computers and how that has lead us both to this blog post today. Sound good? Ok, cool 🙂
👥 My Background
So, like I said, I’m Joel! I’m a software engineer and a musician, but you’re probably here for the former. Please allow me to share a little bit about my experience as a programmer and what brought me to the me you’re reading about today.
About fifteen years ago, I picked up one of my dad’s programming books. I was only 8 at the time, but the book, though only on HTML, sparked an interest in me. From my perspective, I had the power to create anything digitally. I loved the struggle of trying to get layouts to work right and falling into HTML `<table>` tags to get it (this is before flexbox and grid graced this earth). After finding some comfort building static pages with HTML and CSS, I quickly wanted to learn how websites made dynamic content and let users interact with the site — I wanted it to do things.
After a year or so messing around with Visual Basic 6, I was introduced to PHP & MySQL, which landed me on learning to develop websites in a LAMP stack. For the next several years I would create project after project for fun. I created a web-based game where you could create your characters and have them duel, but also had to care for your fighter’s needs. It was basically a mix of Sword & Sandals: Gladiator with Neopets. I took an interest in creating mods for Minecraft and created a website that could generate Minecraft mods for ModLoader and Forge (back in the day). That website was the first thing I created that actually had any success. For half a year, I averaged about 10,000 active users a day. If I was smarter, I would’ve monetized that better.
Contracting & Education
When I was 15 I started to get my first contracting work, mostly subcontracting through a friend who had a successful web development business. While a lot of the work was building static websites for small businesses, there were some interesting projects along the way. One of my favorite projects was creating a Officer management system for the state’s Parent Teacher Association. During this time I started using JavaScript regularly and had my first exposure to front-end frameworks. I continued doing freelancing work until I graduated college and began searching for a full-time position.
After graduating with dual BS in Electrical & Computer Engineering, I took a job at a local company, MidwayUSA, as a Web Applications Developer. This was my first exposure to the “Microsoft web,” where we used .NET Framework, WCF, C#, and the likes. Though I didn’t care a whole lot for the stack, I learned a lot here about front-end development and was introduced to my current favorite language, Elm. Because we were an E-Commerce company, I had the opportunity to work with account life cycles, billing & payment processing, product management, checkout, and much more. We integrated about thirty different services provided by other development teams at the company. I spent most of my time at the company refactoring legacy C# and AngularJS 1.0 code into modern Web APIs and front-end apps in React or Elm.
Elixir / Erlang
During my last few months at Midway I had the opportunity to explore a new-to-me technology, Elixir. I worked with another developer to build an application that would collect and format all of our product data before sending it to our search provider. I really fell in love with the language during this time and read the books Programming Elixir 1.6 and Craft GraphQL APIs with Elixir and Absinthe. These books — especially the Absinthe one — excited me about the technology. So when it came time for me to look for another company, finding a team using Elixir was one of my top priorities.
🧪 Programming Today
At the start of December of 2021, I took a new position as a Software Engineer at InfluxData/InfluxDB. If you’ve worked with time-series data before, you might have heard of them. InfluxData’s main product is their time-series database InfluxDB. Since joining the team, I have had a huge amount of opportunity to learn and grow. With that time and a lot of help from the team, I have made a lot progress learning Elixir in the past month and a half than I did since I started learning in March 2021.
I’m extremely grateful to get to be part of the team I’m on. They are a solid group of individuals and are all talented. I just started my time there, but I’m looking forward to everything in store for me at InfluxData.
💭 So, why this blog?
I really enjoy getting to express my thoughts and feelings creatively. Playing and creating music has been one of my favorites hobbies for the past decade. I’ve really never considered myself as much of a writer (or speaker), but it’s a skill that I would like to develop in the coming years. My intention is to create this blog alongside of a YouTube channel where I can share what I am learning in my career and hobbies. Primarily, I will create posts of programming and technology, but I would also be interested in sharing the thoughts I takeaway from books I read as well and productivity ideas.
I don’t have a grand plan for every step along the way, but writing and sharing is something that I’ve been wanting to do for a while and there really isn’t a better time to start than 5 years ago. Now, since I’ve already missed that deadline, I’ll go for today! Get signed up for my newsletter so you’re not missing out on any posts!
I can’t wait to learn and share!
Joel Abshier
def blog_post(first_post) do
  case first_post do
    %BlogPost{contains_any_code?: false} -> apologize()
    _blog_post -> do_nothing()
  end
end

😭 Forgive me! Code will come soon! 🙏